
H6 Rear Brake Upgrade
This upgrade kit was purchased from subaruxtras.com and
it came with:
2 H6 caliper brackets
2 H6 rotors
The direct link to the part is here:
http://www.subaruxtras.com/subaru/rear-brake-upgrade-p-258.html
Below are all of the parts you will need, including OEM part numbers in case you want to order the previously mentioned kit by the part at your local Subaru Dealer.
2 - 26625AE000 - Legacy rear caliper bracket
1 - 26696FC002 - WRX rear brake pad kit
2 - 26700AE04B* - 2000 + Legacy rear rotor
*Part 26700AE04A is superseded by 26700AE04B
Jack and Jack stands - To get the car securely in the air
Hi temp Caliper Grease - To lube the guides
Brake Cleaner - To clean the rotors when you finish
Brake pad anti-squeal
14 mm socket / ratchet - to remove caliper and bracket
Torque Wrench - To install the parts properly
Rubber mallet or dead hammer - To remove stubborn rotor
If you opt to remove the dust shields you will also need:
Drill and large bit - To drill the spot welds
Hammer - To hit the shield and remove it
Black paint - To paint the marks left by the drill holes in the backing plate.
These increase the size of the rear rotors from 10.3" to 11.4" while retaining the stock WRX calipers and pads.
The procedure is pretty much the same as removing your rotors to replace them (I'll post the whole procedure for those that have never changed their rotors). The one extra step is drilling out the spot welds that hold the dust shield onto the hub assembly and removing the shield. As noted on clubwrx.net and nasioc, this shield isn't really needed unless you're rallying or doing some serious off-roading....
Torque specs:
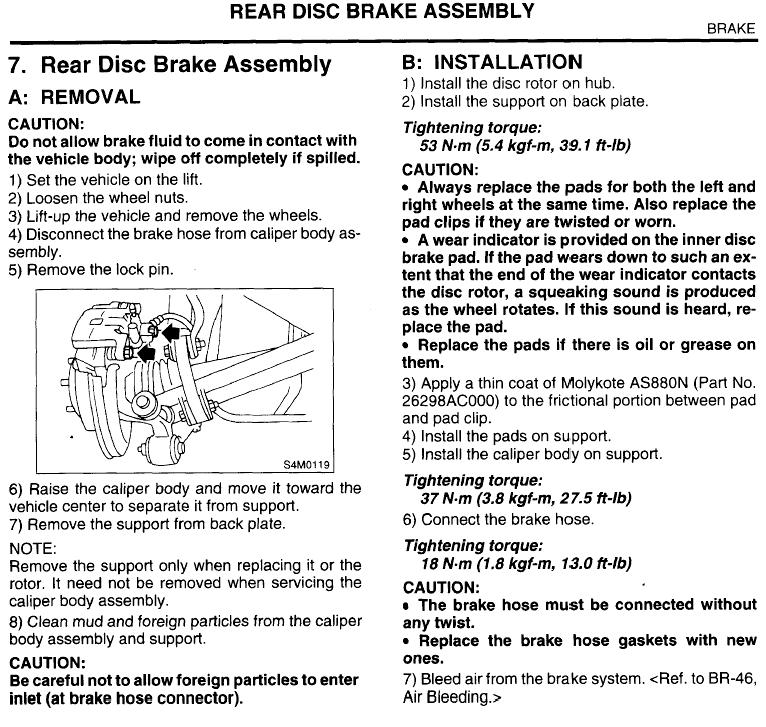
First, support the rear of the car on jack stands and remove the rear tires/wheels. You will be looking at this:
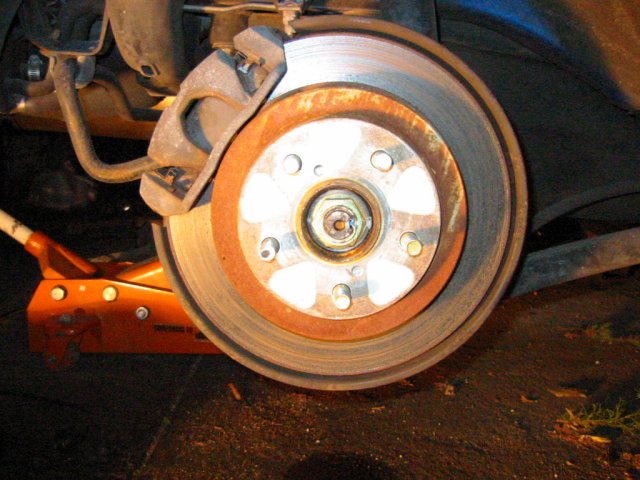
Next, remove the two 14mm bolts that hold the caliper to the caliper bracket and support the caliper using a wire hanger (or bungee cords if you have them):
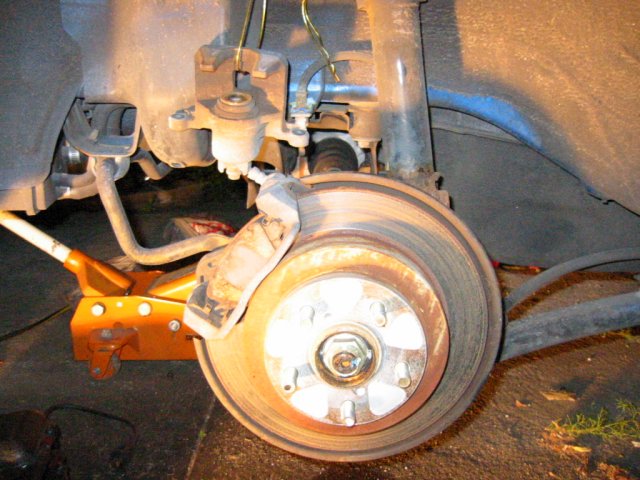
Remove the two 14mm bolts that hold the caliper bracket to the hub assembly and remove the rotor. If you are having a hard time removing the rotor, use a couple of bolts threaded into the two extra holes on the rotor:
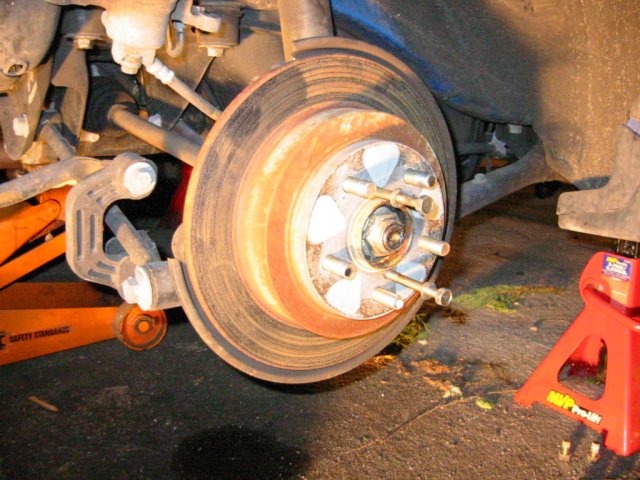
My rotors wouldn't budge so I used a dead blow hammer to try and loosen them up a bit, then threaded in the bolts till they bottomed out. Then I gave each bolt two turns in and went back to the dead blow. Repeat these two steps till the rotor works it's way loose. This was pretty effective in breaking the rotor free. (I've tried using just the bolts in the past and have broken bolts in the rotors....not good...turning a little at a time and hammering on it seems to work the best).
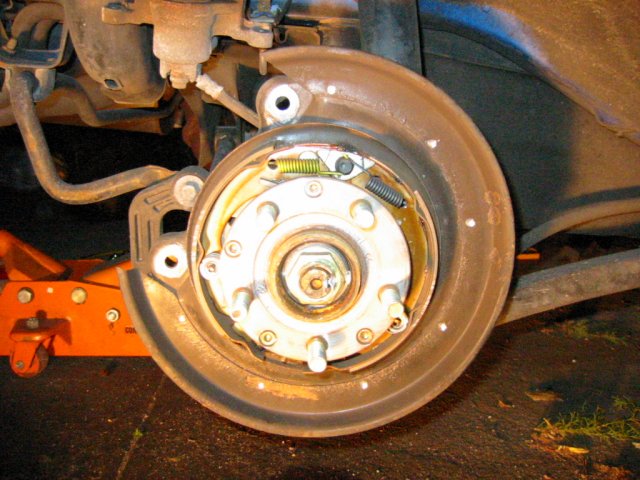
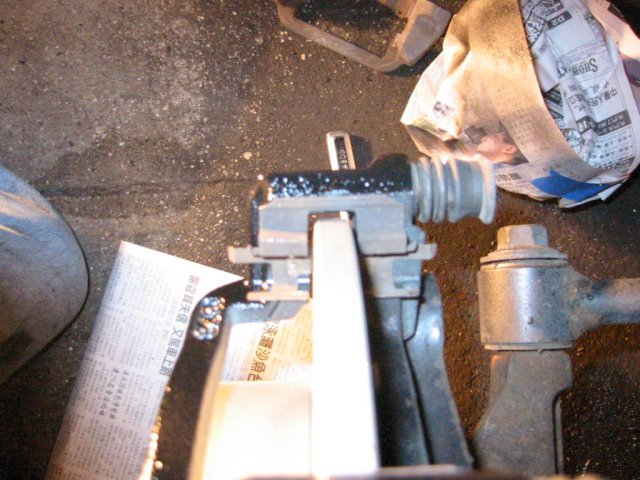
Remove the rotor and you will see the drum brake setup for the emergency brake. At this point, it would be a good idea to cover this assembly with a plastic bag or some news paper for the next step. You need to drill out the spot welds and remove the dust shield as the H6 rotor is big enough to where it won't fit inside the shield. I used a 5/16 drill bit to make sure I got the entire weld in one shot. In the pic below, I drilled each weld a little bit to better show where the welds were on my car:
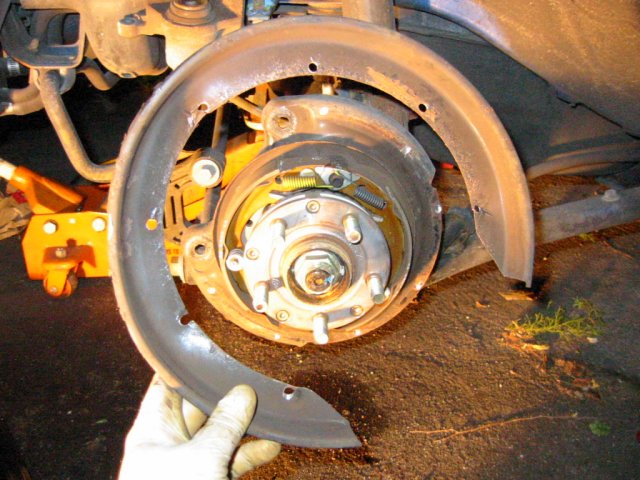
And voila! No more dust shield!
Now for the new caliper brackets. In the pic below, you can see the new bracket is a bit bigger to hold the caliper further away to accomodate the bigger rotor:

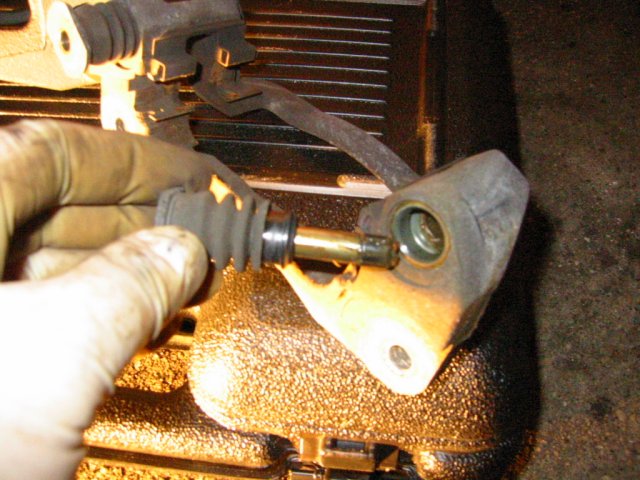
You will need to transfer the brake pad clips and the caliper sliders to the new caliper bracket. You can just pull out the rubber boot and slider together:
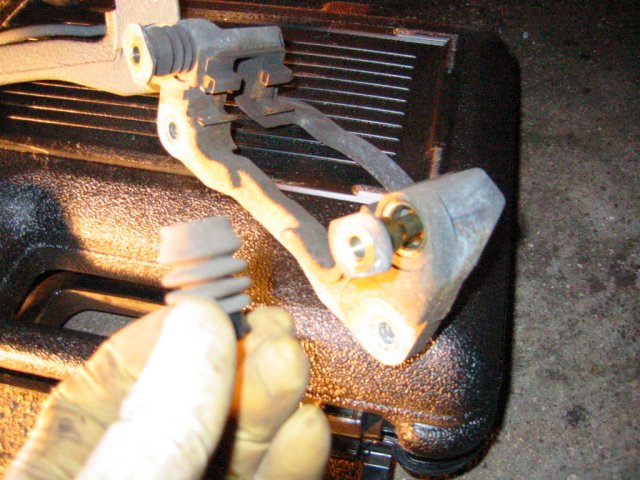
It makes it easier to get the boot/slider into the new caliper bracket if you separate them and shove the rubber boot into the new caliper bracket first (I put the slider back in the old bracket temporarily to keep it free of any dirt):
Install the H6 rotor onto the hub and attach the new caliper bracket using the original 14mm bolts. When you install the brake pad clips, make sure you center them in the caliper bracket as they have some side to side play:
Re-install the brake pads into the caliper bracket, re-attach the caliper to the caliper bracket and you're done! As you can see, I took the liberty of painting my calipers while I did this upgrade.
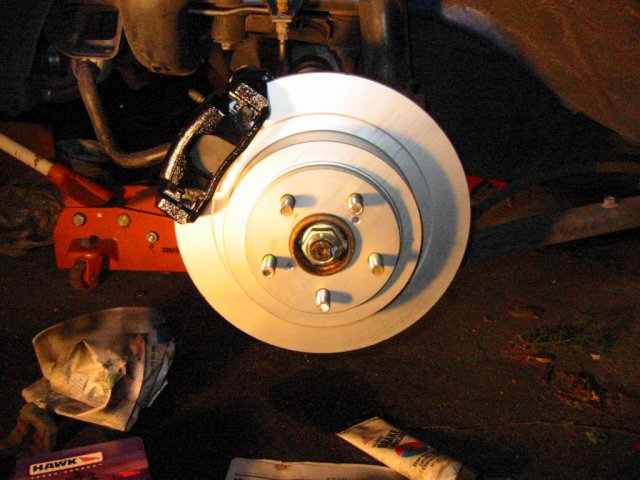
Now all that's left is to re-install the wheels/tires, lower the car off the jackstands and go out and bed the rotors in!
2 H6 caliper brackets
2 H6 rotors
The direct link to the part is here:
http://www.subaruxtras.com/subaru/rear-brake-upgrade-p-258.html
Below are all of the parts you will need, including OEM part numbers in case you want to order the previously mentioned kit by the part at your local Subaru Dealer.
2 - 26625AE000 - Legacy rear caliper bracket
1 - 26696FC002 - WRX rear brake pad kit
2 - 26700AE04B* - 2000 + Legacy rear rotor
*Part 26700AE04A is superseded by 26700AE04B
Jack and Jack stands - To get the car securely in the air
Hi temp Caliper Grease - To lube the guides
Brake Cleaner - To clean the rotors when you finish
Brake pad anti-squeal
14 mm socket / ratchet - to remove caliper and bracket
Torque Wrench - To install the parts properly
Rubber mallet or dead hammer - To remove stubborn rotor
If you opt to remove the dust shields you will also need:
Drill and large bit - To drill the spot welds
Hammer - To hit the shield and remove it
Black paint - To paint the marks left by the drill holes in the backing plate.
These increase the size of the rear rotors from 10.3" to 11.4" while retaining the stock WRX calipers and pads.
The procedure is pretty much the same as removing your rotors to replace them (I'll post the whole procedure for those that have never changed their rotors). The one extra step is drilling out the spot welds that hold the dust shield onto the hub assembly and removing the shield. As noted on clubwrx.net and nasioc, this shield isn't really needed unless you're rallying or doing some serious off-roading....
Torque specs:
First, support the rear of the car on jack stands and remove the rear tires/wheels. You will be looking at this:
Next, remove the two 14mm bolts that hold the caliper to the caliper bracket and support the caliper using a wire hanger (or bungee cords if you have them):
Remove the two 14mm bolts that hold the caliper bracket to the hub assembly and remove the rotor. If you are having a hard time removing the rotor, use a couple of bolts threaded into the two extra holes on the rotor:
My rotors wouldn't budge so I used a dead blow hammer to try and loosen them up a bit, then threaded in the bolts till they bottomed out. Then I gave each bolt two turns in and went back to the dead blow. Repeat these two steps till the rotor works it's way loose. This was pretty effective in breaking the rotor free. (I've tried using just the bolts in the past and have broken bolts in the rotors....not good...turning a little at a time and hammering on it seems to work the best).
Remove the rotor and you will see the drum brake setup for the emergency brake. At this point, it would be a good idea to cover this assembly with a plastic bag or some news paper for the next step. You need to drill out the spot welds and remove the dust shield as the H6 rotor is big enough to where it won't fit inside the shield. I used a 5/16 drill bit to make sure I got the entire weld in one shot. In the pic below, I drilled each weld a little bit to better show where the welds were on my car:
And voila! No more dust shield!
Now for the new caliper brackets. In the pic below, you can see the new bracket is a bit bigger to hold the caliper further away to accomodate the bigger rotor:
You will need to transfer the brake pad clips and the caliper sliders to the new caliper bracket. You can just pull out the rubber boot and slider together:
It makes it easier to get the boot/slider into the new caliper bracket if you separate them and shove the rubber boot into the new caliper bracket first (I put the slider back in the old bracket temporarily to keep it free of any dirt):
Install the H6 rotor onto the hub and attach the new caliper bracket using the original 14mm bolts. When you install the brake pad clips, make sure you center them in the caliper bracket as they have some side to side play:
Re-install the brake pads into the caliper bracket, re-attach the caliper to the caliper bracket and you're done! As you can see, I took the liberty of painting my calipers while I did this upgrade.
Now all that's left is to re-install the wheels/tires, lower the car off the jackstands and go out and bed the rotors in!