|
Foreword:
This is actually a pretty straightforward and
easy procedure. It only requires basic tools and
for the average person, about 20-30 minutes of
your time (as long as everything goes alright).
Tools Needed:
-O2 Sensor Removal Socket (7/8" Deep
Socket w/slit down side)
-19mm socket (depending on the size of your lug
nuts)
-6" socket extension
-ratchet
-flat head screw driver
-phillips head screwdriver
-Liquid Wrench/WD-40/PB Blaster/etc.
-car jack
-jack stands
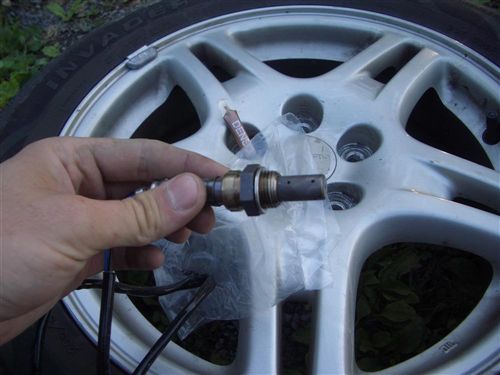
If you do not know what an O2 Sensor Removal
Socket looks like, here is a picture of the one
I used:
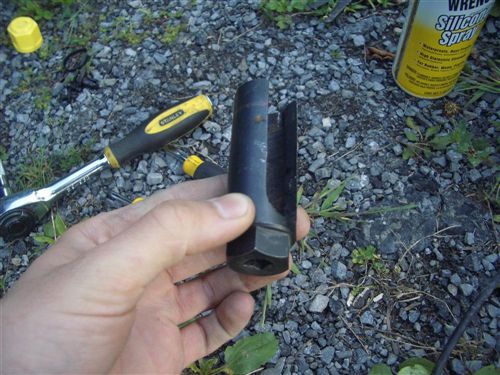
You can buy one from somewhere like Advanced
Auto for about $7
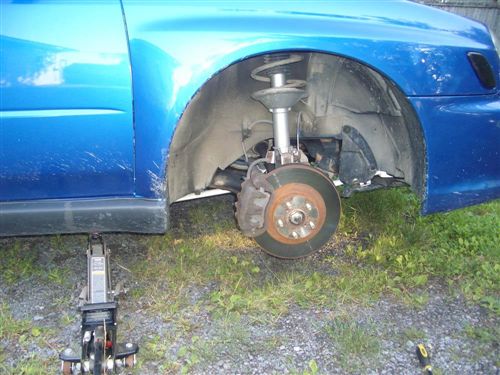
The first thing you need to do is place the jack
under your car. I chose to use the pinch weld
under the passenger's door area. Next you will
want to remove the wheel from the car so you
will have better access to the O2 sensor. I did
this by using a 19mm socket with an extension.
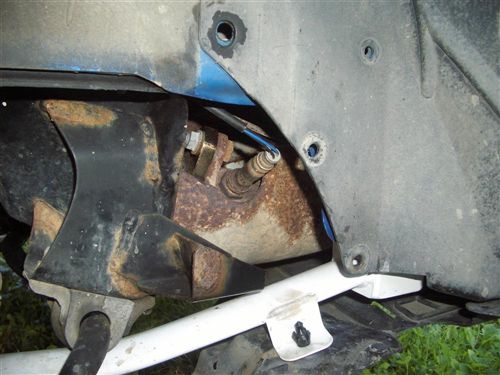
Upon removing the wheel, you should notice a
small plastic flap with a few plastic retaining
screws holding it in place. I have circled them
in red in the picture below.
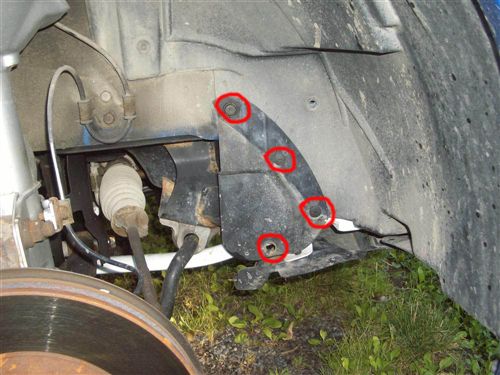
You are going to want to remove these using flat
head and phillips head screw drivers. Take care
in making sure you do your best to not strip
them out. If you do, you will end up having to
either pry them out or pull them out with a set
of pliers. If you need to replace any of these,
you can usually find them at any autobody supply
store or Napa. Anywhere that carries the "Help!'
brand of parts, might also have these (Advance
Auto, Autozone, etc.) The white frame in the
picture is my Carbing Subframe Brace. So, your
setup will look a little bit different, but not
too much.
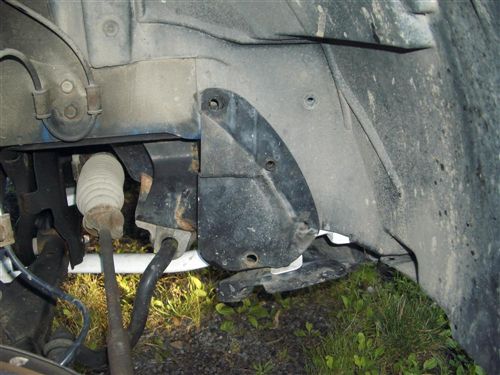
Once you have all of the plastic screws pulled
out, remove the plastic cover.

If you pull the remaining plastic cover to the
right, you will be able to see the O2 sensor.
You can opt to remove the larger of the plastic
fender well shields, but I did not see much
point in doing so as it would not really yield
much more room for access.
With the O2 sensor exposed, you will want to
spray it with some lubricant (PB Blaster, etc.).
With that now soaking in a bit, you are now
going to want to go and pop your hood to gain
access to the plug end of the sensor.
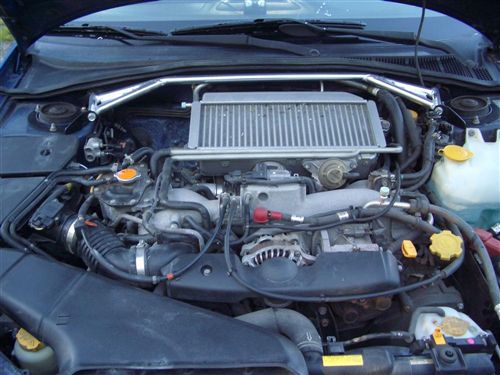
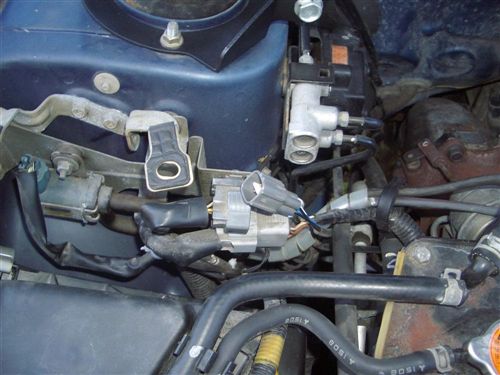
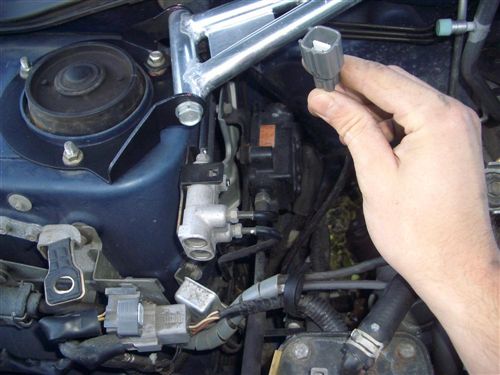
Looking at your engine bay, you will want to
move to the left side (passenger side).
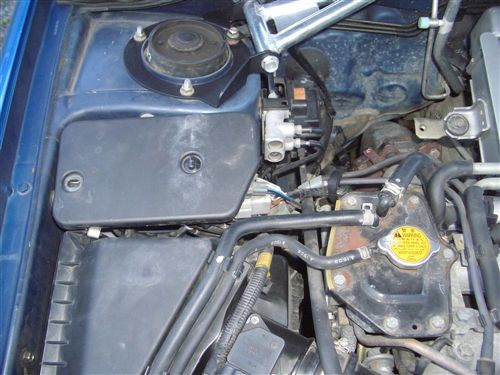
Underneath this cover are two connections, the
top one (circled in red) is for your front O2
sensor.
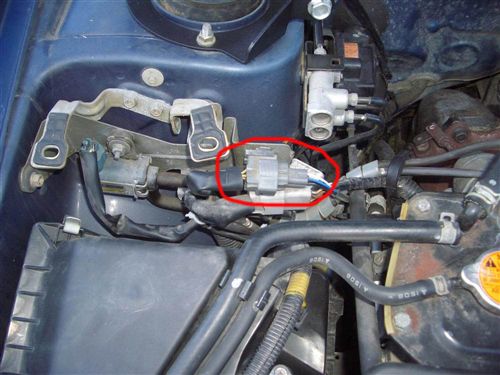
Go ahead and disconnect this plug.
Near the top and the middle section of the wire
the goes between the sensor and the plug, you
will most likely encounter a couple of zip ties.
You will want to cut them so you can pull the
wire from the engine bay down to where the
sensor is located.

At this point you can either choose to leave the
plug/wire connected to the sensor or you can cut
it to make it a little bit easier to remove the
sensor. I chose to leave it connected just in
case the new sensor did not fix the CEL I was
getting. You will want to put the O2 sensor
removal socket on your extension and pull the
plastic flap over to the right again. With the
flap to the side, you would be able to fit the
socket over the sensor without much of a
problem. Go ahead and attach your ratchet.

With a little bit of elbow grease, the O2 sensor
should start to turn and eventually come right
out of it's threaded
home.

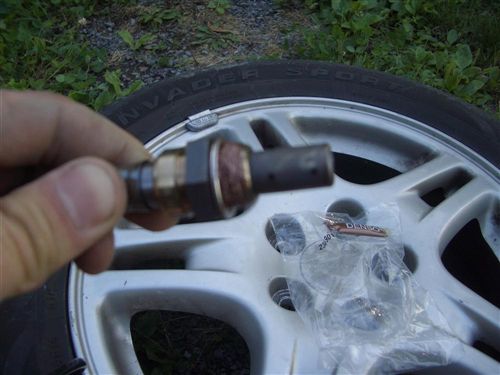
Toss the old sensor to the side and take out
your new non-fouled sensor to admire... As a
side note, you will usually pay about $220+ for
an OEM Denso O2 sensor from the dealer. Even
"discount" auto parts stores can charge as much
or more for this same part. Try ebay...I picked
mine up from an e-tailer on there for $140 ;)
Your new O2 sensor should have come with a
little packet of copper paste. Apply a bit of it
to the threads of your sensor. This will help
ensure that the next time you have to replace
this little guy, it will be even easier to
wrench out.
Go ahead and put your new O2 sensor back in the
bung that your removed the old one from. Screw
it in by hand as far as it will go, making sure
that it goes in relatively easy and you are not
stripping any threads. When it is in as tight as
you can get it by hand, trade up to your ratchet
with the O2 socket on it and tighten it up.
Don't kill it, just get it nice and tight. If
you want to be exact with how tight you get it,
consult the manual for your car to get the
torque spec. Also be careful that the wire
coming from the sensor is out of the way! You
don't want to have to buy another sensor because
you made a mistake and cut the wires. The next
step is to thread the wire/plug back up to where
it plugs in. Make sure you put a couple of new
zip ties back approx. where you cut the old
ones.
Plug the new O2 sensor back in and put the cover
back over it. Now put your wheel back on,
tighten up your lug nuts and lower the car back
down. Now you can either choose to clear the CEL
that you were getting prior to replacing the
sensor with an OBD2 Scanner, disconnecting the
negative battery cable for a few seconds, or any
other method your heart desires. You are done!
|